In this article, we discuss how to play a dulcimer – specifically a mountain (or “Appalachian”) dulcimer. Dulcimers have a long and proud history. They’ve seen use all the way back to the early half of the 1800s.
The mountain dulcimer is an invention of Scottish and Irish pioneers. These pioneers settled in the Appalachia area of North America. It’s from this place that the instrument gets its name. The dulcimer has no direct origins in either Scotland or Ireland.
The dulcimer does overlap with other members of the string family, however, including the Northern European hummel and the monochord. It also shares common lineage with the lute, sitar and of course the acoustic guitar. Because of this, the dulcimer is a great choice for a gateway stringed instrument.
Playing the Dulcimer – It’s Easier Than You Think
You’ll be happy to know that the Appalachian dulcimer is relatively easy to play. It isn’t a masters-only instrument, despite its complicated-looking design. Indeed, it’s often regarded in the musical world as one of the easiest stringed instruments to learn. It’s even easier in some cases than the guitar.
This makes the dulcimer a great entry for newcomers to stringed instruments.
The hammered dulcimer is quite a bit different than a mountain dulcimer – both in shape, sound, and method of play. And the learning curve for a hammered dulcimer may be steeper than that of the mountain dulcimer. But in this article, we focus on how to play the traditional mountain dulcimer.
Read more >>> The Best Hammered Dulcimers Reviewed for 2025
Like any stringed instrument, the dulcimer does have a learning curve. But if you have experience playing a guitar, the transition is quite smooth. Once you have learned how to play the dulcimer, you will come to appreciate its sweet sounds. You may find that its sound has some commonalities to that of a lute or guitar.
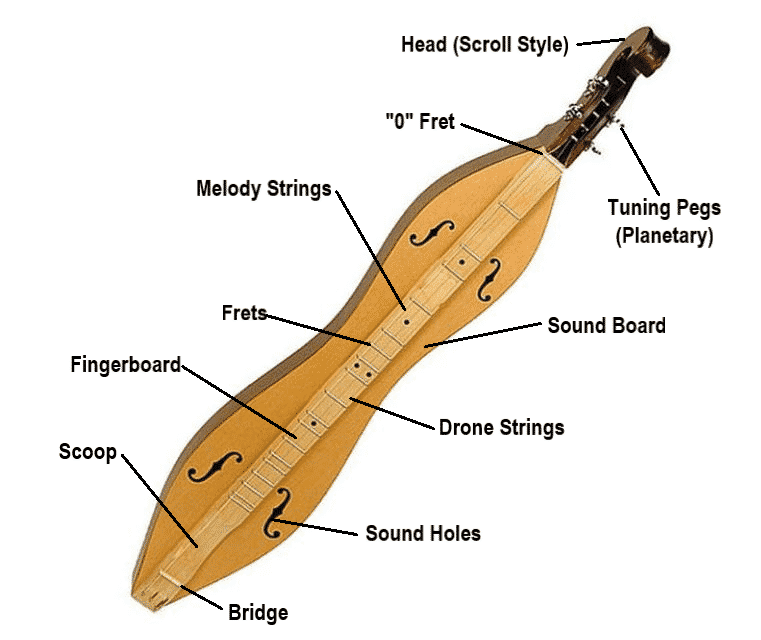
The first place to start to gain familiarity with the dulcimer is its shape. So let’s take a quick look at the anatomy of this unique instrument.
The Anatomy of the Dulcimer
Before playing your dulcimer, it’s important to get to know your instrument. Knowing the terminology can help you understand what we mean when we refer to certain parts of the instrument.
Here we present a simple diagram showing some of the key attributes of the mountain dulcimer.

Tuning Your Dulcimer
While learning to play the dulcimer, it will be important to understand how to tune the instrument. Different tunings gives the player flexibility, and allows for much greater range of tonality. Not only that, but it will allow you to unlock the full potential the mountain dulcimer offers.
Most people use DAA, DAD, or DGD tunings on their dulcimers which work well for 3, 4, and 5 string instruments. What does that mean? Our article on dulcimer tuning below helps explain this.
Read more >>> Dulcimer Tuning
How to Play a Dulcimer: Holding the Instrument
Traditionally, the musician holds the dulcimer by laying it flat on his/her lap in a comfortable position. The head should be to your left. Your right hand is in charge of strumming and plucking, while your left hand is in charge of fretting to produce the notes.
Note that this can also be the inverse for left-handed people as well. Left-handed folks need not worry about compromising comfort while playing. That’s one of the benefits of an instrument that is simple (and symmetrical!) in design.
Some musicians prefer to play the dulcimer by placing it on a table. Here, the table can double as a resonator for heightened volume.
Dulcimers occasionally come with shoulder straps, making them easily transportable. One can also move into different positions without worry of dropping the instrument.
While holding a dulcimer horizontally is traditional, some musicians prefer holding a dulcimer in an ‘autoharp’ style. This depends upon the playstyle. Autoharp style is where you hold the dulcimer in a vertical position, or guitar style, where it’s held sideways on the lap.
As mentioned, the mountain dulcimer comes in a variety of different shapes. For the most part, though, shape has no major bearing on how you hold the instrument. This is also true with playing. The only exception to this may be in the case of the addition of a second fretboard on some dulcimer designs.
How to Play a Dulcimer: Picks & Noters
One important thing to note is that dulcimers are not always played with your hands alone. Often, you need two things to produce the highest array of sounds that the dulcimer is capable of. These are the plectrum, or guitar pick, and the traditional noter.

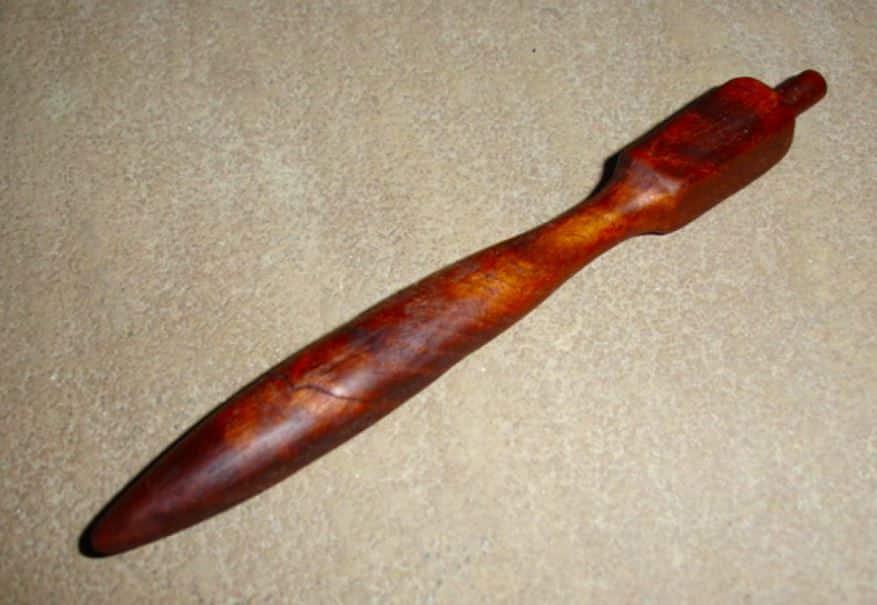
While you may play your dulcimer with a guitar pick, dulcimer players traditionally make use of a noter. Players use a noter to hold down a single string (on a 3 string dulcimer) or 2 strings (on a 4 string dulcimer) to play the melody.
Two strings, the bass and middle strings, are not noted when you play in the traditional style. These serve as “drones”, which have a constant sound reminiscent of bagpipes.
There are many noters available today, ranging from traditional hardwood varieties to those made from other less traditional materials such as glass. To find out more about how to use noters, and to review inexpensive options, read our article below.
Read more >>> Best Dulcimer Noters
How to Play a Dulcimer: Strumming and Chord Development
For starters, notice how your dulcimer is strung. In most cases, the instrument is strung with the melody string on the side facing the player, whilst the bass string is situated on the side facing away from the player.
Similar to a guitar, there are spaces (or “frets”) that run along the fingerboard from the head to the bridge. Your first fret is typically the note E on the neck. The note E is easiest to remember usually because it’s right below the head of your dulcimer.
Moving onwards from E, the second fret is F sharp. The third is G. The fourth is A, and the fifth is B. The sixth is C sharp. The seventh is D but one octave higher. The eighth is E: higher octave. Ninth is F-sharp: higher octave. Lastly, the tenth fret is G, completing the orientation of the fretboard.
The dulcimer is unique in its tuning and chord structure relative to the guitar. But once you’re familiar with the basic geography of the instrument, it’s time to start experimenting with different chords.
Chords are two or more notes which you play in unison, otherwise known as harmony. There are different types of chords, and you will discover them as you learn and practice over time.
Begin with a motion that starts close to you before moving in an outward direction. One very basic chord progression is D, G, A. Here, D is the first chord you strum (unless your dulcimer has some form of alternative tuning or arrangement).
Playing Your First Chord
While strumming, place the noter on the first fret. From there, you gently apply pressure while you strum your strings. In doing so, you have played your first E chord!
With a pick and noter handy, make sure the noter is in your non-dominant (left for most people) hand. It should be between the thumb and forefinger, while the pick is in your right hand.
With control over your fretboard, your progression continues. You can now begin experimenting with the other frets while you strum. Over time, you can achieve the different chords the dulcimer is capable of producing.
From there, one of the most important things to master is finding and maintaining your rhythm. Rhythm lies at the core of any song, and is for some people the true curve to tackle and conquer.
How to Play a Dulcimer: Achieving a Rhythm
One great way to master rhythm is to start by focusing on simple chord transition. Play each chord by itself once you have mastered the fretboard. Continue this until reaching each chord becomes completely natural and second nature. Or at least until its takes less time to think about before executing. Either way is a good sign of progress.
Achieving faster rhythms takes patience and practice. Begin be mastering the downstroke (strokes directed towards your body) on the dulcimer. Once you are comfortable with downstrokes, combine with upstrokes (strokes directed away from your body) to achieve rhythm.
Like with a guitar, you can alternate downstrokes and upstrokes or combine in any way to achieve the desired rhythm.
How to Play a Dulcimer: Maintaining a Rhythm
If you need extra help in keeping rhythm when learning chords, don’t worry! There are a few different tricks out there.
One approach is obvious – simply tap your foot while strumming. This keeps the rhythm going, and gives you a sense of the passage of time in relation to your overall rhythm.
A metronome can achieve this same effect. This is a small device that is designed to keep a beat at a certain timing forever. Metronomes were originally created in the 19th century, and help musicians play songs with the right pace and proper time signature. They can be used for any instrument, even the dulcimer.
Like metronomes and tapping your feet, singing or humming is another option. While practicing, it can help you to achieve and maintain a steady rhythm. Singing while learning is also useful if you desire to eventually be part of a band.
There is a very intricate lyrical heritage that grew up with the dulcimer. It’s associated with the very same pioneers that invented the dulcimer generations ago.
Putting It All Together
With a basic understanding of how to play the mountain dulcimer, instructional resources will make more sense. In this video, Jessica Comeau demonstrates how to play the mountain dulcimer in her two-part series. She provides wonderful guidance and inspiration to budding dulcimer players.
Please be sure to like her video and subscribe to her channel.
Dulcimer Sheet Music
Sheet music is also an invaluable aid for beginners and advanced dulcimer players alike. Be sure to check out our variety of over 1000 free dulcimer tabs and sheet music to get you started. These include simple songs with basic chords in DAD tuning to more advanced songs with different stroke arrangements.
Experiment with these to get a feel for your instrument. In many cases, you can tell the difference between an upstroke and downstroke with ease (they are indicated as D or U respectively on the sheet music).
Taking it slow at first is also prudent with these arrangements. This allows you to master your timing and precision. Timing and precision are part of the foundation for all musical rhythm. In other words, go at a pace that’s most comfortable for you – everyone’s learning style is different.
Dulcimers are Great for Beginners
Dulcimers are a great choice for newer musicians. This is because they’re one of the easiest stringed instruments to learn but also on the harder side to master. They will continue to provide you with new challenges as you play them over time.
These challenges invite you to try new ways to play them. Many playing styles have emerged for the dulcimer over the years. Who knows, perhaps you may one day pioneer a new playstyle of your own!
Dulcimers are also lightweight. This makes them a lot less imposing to pick up and play compared to cellos or bases.
As mentioned above, dulcimers have a lot of crossover with other stringed instruments. A lot of their common lineage lies with the hummel, guitar, lute, sitar and much more. Because of this, the dulcimer is also a great choice as a gateway instrument. It can encourage you to explore the rest of the string family.
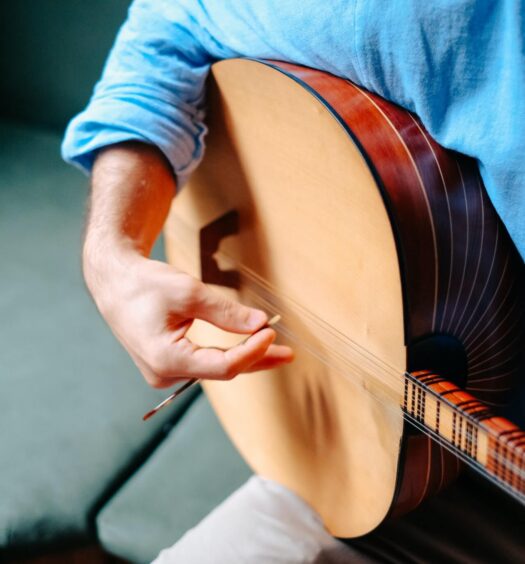
Lyre harps also share some lineage with the dulcimer as a stringed instrument with a rich history. They’re also quite easy to learn and have similar tonal qualities as the dulcimer. They’re affordable too.
Read more >>> Best Lyre Harps for Beginners
Join a Dulcimer Club
Joining a dulcimer club is a great way to learn more about your instrument and mingle with like-minded folks. It also provides opportunities to practice (and even perform) in an inclusive, accepting environment.
There are several clubs throughout the United States. Explore our list of some of the most active clubs.
Read more >>> Dulcimer Clubs in the South
Read more >>> Dulcimer Clubs in the Midwest
Read more >>> Dulcimer Clubs in the West
Read more >>> Dulcimer Clubs in the Northeast
Practice Makes Proficient!
As with all musical instruments, regular play and experimentation will hone your skills. Mountain dulcimers, let alone their hammered cousins, are not mastered in a day. Mistakes will happen even as you start to maintain a rhythm, but that’s how you learn.
Regular dulcimer practice can also help improve your hand coordination, useful for exploring other instruments in the string family. Once you have developed proficiency with playing your Appalachian dulcimer, take pride! You’re lending vibrancy to a musical instrument lineage and keeping the dulcimer tradition alive.
Looking for additional inspiration? Check out our article on some of the most famous dulcimer players of our time.


